Using Placeholders
Written By revealai
Last updated 3 months ago
RevealAI offers two different types of placeholders which you can use to create personalized interview flows:
Previous Response placeholders - insert content from a response to a previous question
Custom attribute placeholders - insert custom data into any question
We'll cover how to set up each below:
Previous Response Placeholder
Create at least one question to start
Edit the question ID to something meaningful (optional, but helpful)
Create a new question
Click the Add Placeholder button (button highlighted in red in image below) from the toolbar. This will display the placeholder modal.
Select the question you’d like to refer to
Click “Insert”

That’s it. Now the chatbot will refer back to the previous questions answer to create a more seamless experience.
If you wish to edit or delete the placeholder, simply click on the pencil or trash can icon on the chip, respectively.

Custom Attribute Placeholder
Custom Attribute Placeholders are set up in a similar fashion to the Previous Response Placeholders. The main difference is how the data is supplied. While Previous Response Placeholders pull in data from previous questions, Custom Attribute Placeholders are fed externally via url parameters. These are used for information about the participant that is known prior to taking the interview. Think things like, first name or job title or location. Let’s take a look at how to take advantage of this amazing feature starting with attribute creation in the interview.
Create a new question.
Click the Add Custom Attribute Placeholder button (button highlighted in red in image below) from the toolbar. This will display a dropdown menu.
If you don’t have established attributes, “New Placeholder Attribute” will be the only option. Click that option to get started. Once you have created attributes, the will be displayed here to reuse quickly.
You should now see the Create Custom Attribute Placeholder. Give your attribute a meaningful name. Please not that no spaces are allowed — dashes or camel case are advised. You may also leave additional instructions for the chatbot at this point.
Click Insert. The placeholder will now appear inline as part of your question.

Managing URL Attributes
In the Design tab settings you can see a list of custom attributes you have defined for a chatbot, edit their titles, and add new ones. These custom attributes can be used as placeholders in the chatbot questions or they can simply be extra data that you’d like to attach to an interview.
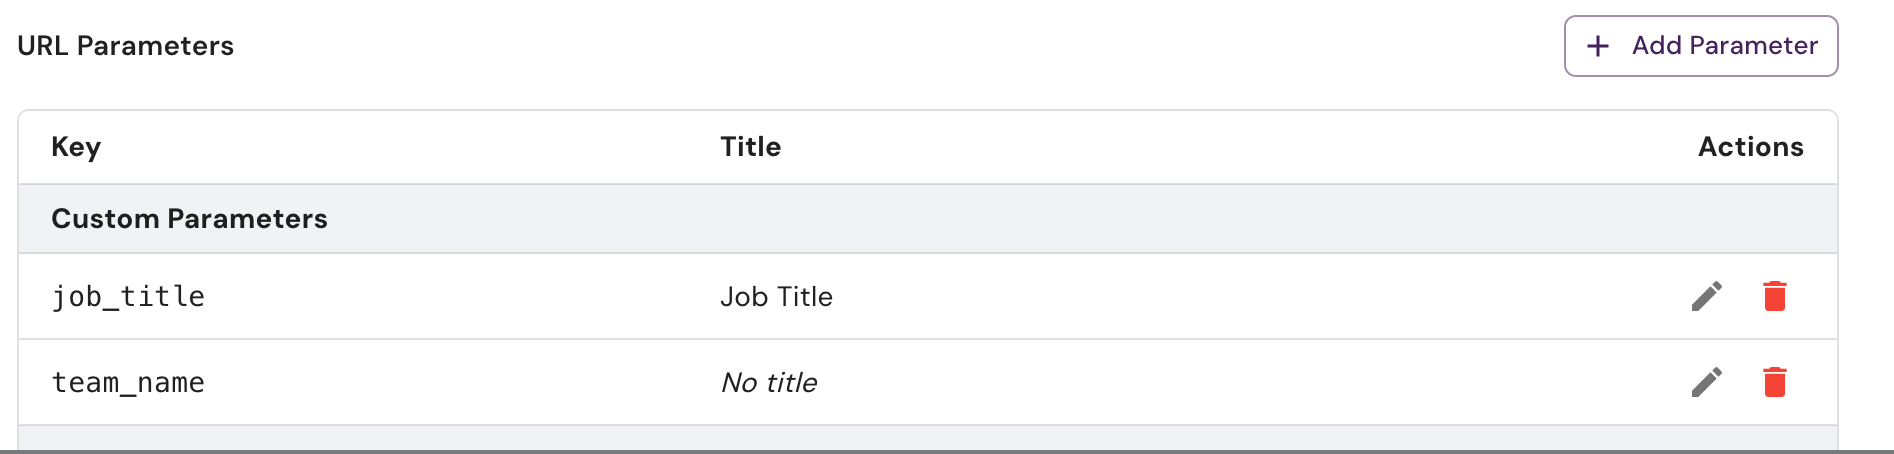
Providing Attributes to the Interview
Now that you have a custom attribute created and inserted into a question, let's learn how to get some custom data in there.
To provide the attribute/placeholder value to an interview you must inject it via the interview URL query parameters. Pass the attribute key followed by the value in the URL like
// Simple Example
var url = "https://chat.getreveal.ai/i/6877cb3d6f0cc6a09862d275?job_title=manager"

// if the value has special characters that would cause issues with the URL, the javascript encodeURIComponent is used to ensure the attribute value does not break the URL
var url = `https://chat.getreveal.ai/i/6877cb3d6f0cc6a09862d275?team_name=${encodeURIComponent('UX & Design!')}`
Please note that in the past we required that a placeholder attribute be passed in the URL with the attribute- prefix. So to pass a Abigail for the placeholder supervisor_name you would need to add &attribute-supervisor_name=Abigail. This is still accepted but you no longer need the attribute- prefix for attributes that are defined under the URL params section of the Design tab settings. You can simply pass &supervisor_name=Abigail
Was this helpful?
Still need help? Ask the team